Alright we’re back for episode 2! We’re going to walkthrough the script we generated in our first episode in order to cover the fundamentals of programming. By covering all this now, we’ll be able to get to more of the “fun stuff” in future episodes.
Heads up!
Code can be tricky and intimidating. Don’t worry if you don’t understand everything right away. This is a lot of information to take in, and it may take some time to get comfortable with it all. We’ll do our best to make sure you have multiple ways to understand these concepts and we’ll be revisiting several of them throughout the series.
Oh… and code is a very self-referential thing. This makes teaching it any specific order very difficult. So if you find yourself confused at any point, just keep reading/watching, and then come back. It might make more sense after some additional context!
As a quick refresher, code is just text that becomes instructions to the computer1. For this process to be successful, there are some rules around how the text is formatted and what words we can use. This is called the syntax of the language and we’re going to explore that in detail.
As a reminder, here’s where we left off in the last episode:
scripts/player.gd
1extends CharacterBody3D234const SPEED = 5.05const JUMP_VELOCITY = 4.5678func _physics_process(delta: float) -> void:9⇥# Add the gravity.10⇥if not is_on_floor():11⇥⇥velocity += get_gravity() * delta1213⇥# Handle jump.14⇥if Input.is_action_just_pressed("ui_accept") and is_on_floor():15⇥⇥velocity.y = JUMP_VELOCITY1617⇥# Get the input direction and handle the movement/deceleration.18⇥# As good practice, you should replace UI actions with custom gameplay actions.19⇥var input_dir := Input.get_vector("move_left", "move_right", "move_forward", "move_backward")20⇥var direction := (transform.basis * Vector3(input_dir.x, 0, input_dir.y)).normalized()21⇥if direction:22⇥⇥velocity.x = direction.x * SPEED23⇥⇥velocity.z = direction.z * SPEED24⇥else:25⇥⇥velocity.x = move_toward(velocity.x, 0, SPEED)26⇥⇥velocity.z = move_toward(velocity.z, 0, SPEED)2728⇥move_and_slide()
The first thing on our tour of programming is comments. Comments let us write anything we want and it will be ignored by the computer. This is a great way to document our code for ourselves2 and others, or to disable code temporarily without losing it.
GDScript only supports a single type of comment, which is known as a line comment3. This means a comment can only be a single line, but we can have as many line comments as we want4. We can create a line comment by starting a line with the # symbol. Everything after the # on that line will be ignored by the computer.
# This is a line commentpass # This is also a line comment
We can even have line comments that follow code on the same line, but once the comment has been started, the rest of the line is ignored. I’m sure you can already see some comments in the player.gd code that Godot gave us in the last episode.
Most languages have comments
Though the way the formatting is handled or the type of comments supported might be different, most langauges line comments starting with a character sequence indicating a comment is starting.
The most prevalent of these patterns is //, which is thanks to the C programming languages and the languages that have been inspired by it. GDScript took a lot of syntax inspiration from Python, which is why it uses the # symbol.
Something we unfortunately needed to cut from the video are documentation comments. These are special comments that start with two hashes instead of one.
Given the comment in our code (top), we can see the tooltip in our code editor (middle right) and in the generated documentation page for player.gd (bottom left).
When used above declarations, like variables, the comment5 will appear in tooltips when we hover over the declared property in our code editor or in Godot’s Inspector panel.
Documentation like this becomes super important when writing code that will be used by others. This includes the non-technical folks on your team too — who may be seeing your documentation in the tooltips for the @exported properties that appear in Inspector panel.
Debugging is a natural part of programming — actually it might be the most natural part. If the term is new to you, “debugging” is simply the process of finding and fixing bugs in our code.
When your code doesn’t work as expected (and this will happen), it’s important not think of it as failing. It can definitely feel that way, especially when you’re first starting out, but encountering errors is just part of the process. Even the most experienced game developers spend a significant portion of their time tracking down and fixing bugs.
Why do we call them &lquo;bugs&rquo;?
Back in the old days computers were more analog than digital, relying on tubes and wires in place of transistors and chips. These systems were prone to a lot of physical interference, including actual bugs.
The term “bug” was popularized in 1947 when Grace Hopper and her team found an actual moth trapped in a relay of the Harvard Mark II computer. They taped the moth into their logbook with the note “First actual case of bug being found.” The term stuck, and we’ve been “debugging” our code ever since.
Fortunately, Godot provides several tools to help us understand what our code is doing (or in some cases, what it’s not doing). At the bottom of Godot’s interface, you’ll find a series of tabs that give us access to different problem-solving tools.
When your code produces an error, Godot will usually switch to the debugger tab for you. This tab contains several sub-panels that provide different types of information:
Errors: Shows syntax errors and runtime exceptions
Debugger: Allows you to pause execution and inspect variables
Profiler: Shows performance information
Network: Displays network activity for multiplayer games
Audio: Shows audio-related information
Additionally, Godot’s built-in text editor will show an indicator on the left side of the line number to highlight where an error has occurred. This visual cue helps you quickly identify which line contains the issue.
Reading Error Messages
Learning to read error messages is an essential programming skill. Most errors will tell you the precise location using a line:column format (e.g., “Error at line 15:23”).
The first number represents the line in your code file, and the second number (after the colon) represents the specific column or character position on that line where the error was detected.
Don’t be intimidated by technical error messages! They are trying to help you, even if they seem cryptic at first.
Something we didn’t discuss in the video is that there are different types of “bugs” and errors. If the problem has to do with how you wrote the code, we call this a syntax error. If it’s a problem related to a type6 mismatch, it’s called a type error. If the code runs but doesn’t do what you expect, we call this a logical error.
Types of Errors
Depending on the language, some of these issues can be got “ahead of time”7 while others are only caught while the code is running. When bugs happen only while the code is running, we categorize them as runtime errors.
That last one, logical errors, is probably the trickiest to track down. A logical bug often times has to do with the order of things happening within your code or a misunderstanding of what certain things were supposed to do.
As we progress through this series, we’ll introduce various debugging techniques but the two most common ones are:
Print statements: Adding print() calls to your code is one of the simplest debugging techniques. This involves adding a piece of code that will spit out information to the “console” (or “Output” panel in Godot). We talk about this more in a bit.
Breakpoints: These allow you to pause your game at specific lines of code to inspect what’s happening at a deep level. You can even step between breakpoints to analyze your code in a step-by-step process. This is significantly more powerful than using a bunch of manual print() lines, but it can be more work to setup initially8 and has a steeper learning curve.
Remember, becoming good at debugging is just as important as becoming good at writing code in the first place. In many ways, it’s the mark of an experienced programmer!
Before we go much further, let’s talk about why our text is highlighted with a bunch of different colors. This is a feature called syntax highlighting, and you’ll find it in virtually any code editor9. Syntax highlighting helps us read our code by using different colors for different types of code elements.
For example, in GDScript you might see keywords like if and func in blue, strings in green, and numbers in orange. This visual differentiation makes it much easier to understand the structure of our code at a glance, rather than seeing everything as one monochromatic wall of text.
Beyond just making our code prettier, syntax highlighting serves a practical purpose. It can help us spot errors faster — if you’re writing a string and don’t see the expected color change, you might have forgotten to close your quotation marks. Similarly, if a keyword isn’t colored as expected, you might have misspelled it.
Not a replacement for understanding
While syntax highlighting is incredibly helpful, it’s not a substitute for actually understanding what your code does. It’s a tool to help you read and navigate code more efficiently, but the colors won’t tell you if your logic is flawed or if you’re using the wrong approach to solve a problem.
It’s worth noting that the specific colors you see depend entirely on the “theme” of your editor. In Godot, you might be using the default dark theme, but you could switch to another theme and suddenly find that your variables are yellow instead of white. This is why it’s best not to get too attached to specific colors representing specific things.
Here you can see some different code editor themes applies to the same piece of code. The eagle-eyed among you may notice that one of these feels familiar.
What matters more is the categorization itself — the fact that different types of code elements are visually distinct from each other. This categorization helps your brain process the code faster, regardless of which specific colors are used.
As you continue writing code, you’ll find yourself naturally associating certain visual patterns with certain code structures, making it easier to skim through code and understand what it’s doing without reading every single character.
We should dive deeper into something we touched on briefly in the video: keywords. These are words that have special, predefined meanings in a programming language. Think of them as the “magic words” that tell the computer to perform specific actions or define particular structures in your code.
Keywords are reserved by the language itself, which means you can’t use them for naming your own stuff (like variables, which we’ll get to soon). If you try to use a keyword as a name for something else, the language will throw an error at you because it’s already using that word10 for something important.
# This works finevar player_health = 100# This would cause an error because "var" is a keywordvar var = 50 # The computer would be confused - is this a variable named "var"?
Many programming languages share similar keywords11. For example, if is used in the majority of languages to start a conditional statement. Other common keywords you’ll see across languages include for (used for loops), return (to send values back from functions), and true/false (representing boolean values).
The exact set of keywords varies from language to language. GDScript has many keywords in common with Python since it was inspired by it.
As you become more familiar with GDScript, you’ll naturally memorize these keywords through usage. Don’t worry about memorizing these all right now — we’re going to be covering them in more detail as we go along. Just be aware that these special words exist and serve specific purposes in telling the computer what to do.
Spotting keywords with syntax highlighting
Remember our discussion about syntax highlighting? One of its most valuable functions is making keywords stand out. In most editor themes, keywords are highlighted in a bold color to help you instantly recognize them as special parts of the language.
In Godot, we’re going to see keywords in “red” and “pinkish red”.
#A grammar-based approach to learning codeJump to 7:29
One helpful way to approach learning programming is to think of it like learning a natural language. We can use a English to create a comparison.
Like most languages, in English, we have grammar — the set of rules that define how we can put words together to form meaningful sentences. We organize words into categories like…
Nouns: People, places, or things (dog, house, player)
Verbs: Actions or things happening (run, jump, attack)
Adjectives: Words that describe nouns (big, red, powerful)
Programming languages have their own grammar12 too, with similar categories that help us organize our code into meaningful structures and patterns. By identifying things in this way we can start to look at code almost like a game of Mad Libs.
Declarations: Define things to the computer
Statements: Changes program state or the “flow” of execution
Expressions: Produces a value
And just as natural languages have subcategories (like “adverbs” that modify verbs) programming languages have subcategories too. For example, we have expression statements, which are just expressions that are used as statements13.
Many languages share similar syntax
You may start to notice that most programming languages share similar syntax patterns and concepts that often don’t stray too far from what we see in GDScript. Sure the keywords or order might change, but the core principles usually don’t.
This is why experienced programmers can often pick up new languages quickly. They already know the “grammar” of programming, so they just need to learn the specific vocabulary of the new language.
We’ve already seen a few examples of literal expressions by this point, because they’re the most obvious kind of expression you’ll see in programming. They’re called “literal” expressions because they literally represent the value you see.
Let’s start with numbers. When we see a number like 5 in code, it represents an “integer literal” producing the value of 5. An integer, or int, is a whole number, meaning it doesn’t have any decimal places. So 5 is an integer literal that represents the value of 5.
If we stuck a decimal point in there, like 5.0, we would be looking at a “float14 literal” instead. A float is a decimal number, so 5.0 is a float literal that represents the value of 5.0.
Though it might not seem like it, our next literal (and type) is also a number… at least technically15. This is the bool type, which is short for “boolean”. A boolean is a value that can only be either true or false. The fact that it can only be one of two values is why languages often implement them as keywords.
Next on our plate is strings, which we use to represent text. We call them strings because they’re a string of characters. We wrap strings in double quotes16 so the computer knows where the string starts and ends. If we didn’t, the computer would try to interpret the text as code, creating an error.
There are other types of literals, like null, arrays, and dictionaries, but we’ll cover those as we need to. Understanding these basic types and the literal expressions that represent them is a great starting point for understanding how to work with data in GDScript.
Classes are a “data structure” that let us group together related code and data into something we can use to create “objects”17. A helpful analogy is to think of a class like a blueprint that defines a house. The blueprint itself isn’t a house — it’s just the definition used to build one.
On the left is a GDScript file which itself is a class. On the right is a C# file where we explicitly declare a class using the class keyword.
Typically you would declare a “class” using a keyword like class18, but GDScript does something a bit different. Each .gd file we create is a class declaration! This is a bit different from most other programming languages, where you would describe a class or struct as something in the file itself (much like we’ll do with var and func in a bit).
Let’s extend our house analogy a bit further. Imagine we have a blueprint (class) for building houses that specifies the properties each house has.
Every house has an address
Every house has some number of rooms
Every house has an exterior color
On the left is our “blueprint” for a house and on the right is the same thing as a GDScript class (not a file class though).
This blueprint defines the properties of a house, but it doesn’t actually create a house. To create a house, we need to use the blueprint to build one. This is where the concept of “instantiation” comes in.
When we use the blueprint to build a house, we’re creating an “instance” of that blueprint. Each house we build can have its own unique address, number of rooms, and exterior color. So while they all share the same blueprint (class), each house (instance) can be different.
We use classes (left) to make instances (right), otherwise known as “objects”. The .new() will make sense in a moment.
Fast forwarding just a bit19, here’s an example of what this process would look like in code:
Even though house1 and house2 were created from the same blueprint (class), they have different values for their properties. They’re distinct objects that can exist independently in your game world.
In our game, we’ll be working with many different classes — in fact we already have. Each Node type that Godot gives us is a class that defines the properties and behaviors for that type of node when we “instantiate” it by adding it to our scene tree.
One of the most powerful features of classes is that they can extend other classes. This allows us to build on top of existing code and inherit20 all the properties and functionality of the class that we’re extending21, without having to rewrite everything from scratch.
The classic example used to teach this concept involves animals, so let’s stick with tradition. Imagine we have an Animal class: this would be any living thing that is multi-cellular and breathes oxygen.
Then we have a Mammal class, which extendsAnimal. This means that a Mammalis an Animal that also breathes oxygen and is alive. But Mammal also has some unique things that are specific to mammals, like having fur, giving live birth, and being warm blooded.
Finally, we have a Dog class, which extends Mammal. Dog is still both a Mammal and an Animal, but it also has some dog-specific properties, like having four legs22 and the ability to bark.
How the heck do you visually represent Animal or Mammal?
This inheritance establishes an “is-a” relationship between the classes. For example, a Dolphin class could also extend Mammal23, but it wouldn’t be a Dog. So a Dolphin is a Mammal and an Animal, but not a Dog.
Bringing this back to GDScript, we can start to understand what the first line of script is doing in our player.gd file.
extends CharacterBody3D
The extends keyword is telling the computer that our script inherits everything from the CharacterBody3D class…
Remember how our 3D nodes have a salmon-colored icon? This is because they all extend from the Node3D class, which gives us everything needed to render 3D objects in our game. Most notably our transform properties, like position, rotation, scale, and even our visibility25 property.
This is a powerful concept, because it provides a way to create a hierarchy of classes that share common properties and behaviors. By extending classes, we can build upon existing functionality without having to rewrite everything from scratch.
You'll see this hierarchy everywhere
This is such a fundamental part of how Godot’s system works that you’re going to see it represented in the user interface of the editor and documenation.
Next up is the const keyword, which is short for constant and we use to start a constant declaration. This was provided to us by Godot when we created our script using the CharacterBody3D template.
But… before getting into constants, it’s honestly more useful to talk about its more common cousin first: variables. So let’s change const to var and while we’re at it, change the spelling from SPEED to speed.
Why did we change the name?
Programming is full of “implicit rules” known as “conventions”. These conventions are not enforced by the computer, but are decided by the community or language/library/framework/engine programmers to act like a set of guidelines.
The reason we changed the name of the variable is because of something called a case convention. The idea is that it helps keep our code looking consistent and can sometimes provide useful context about the type of thing we’re working with. For example, constants are usually all uppercase — so if you see a value formatted like SPEED, you can assume it’s a constant.
There’s a few different casing conventions that are common among most programming languages. GDScript primarily uses snake_case for things like variable and function names. This is where we use lowercase letters and separate words with underscores. They also use PascalCase for class names, which is where we capitalize the first letter of each word.
Variables are one of the most important concepts in programming. They are the primary way of storing the data that makes up our game. In GDScript, we declare variables using the var keyword, followed by the name we want to use to identify the variable26.
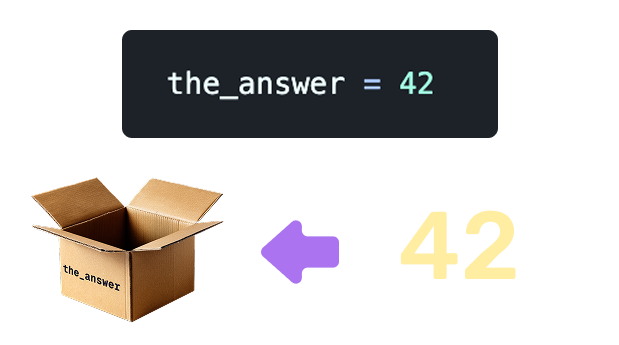
We’ll use the analogy of a box to help us understand how variables work. Each variable is like a box that we can put something (data) into and take out of. The name of the variable is like a label we scribbled on the side of the box to help us find it in a room full of boxes27.
We can tell the computer what’s “initially” in the box by using the = sign. This takes whatever value is produced by the expression on the right and puts it into the box that we defined on the left. If we don’t provide an initial value, the box will be empty28.
We say “initially” because we can change the value of the variable later on. This is an important distinction to make, as it means the contents of the box can (and often will) change over time. For example, if we have a variable called player_health, we can change its value to represent the player’s current health at any point in the game.
Properties29 are just variables defined directly inside of a class. Unlike variables inside of functions (we’ll get to those soon), properties exist until the object they belong to is destroyed30. Things declared directly inside of a class like this are called the class’s members.
We’ve already heard the term “property” thrown around multiple times in this series, and that wasn’t by accident. You may even remember that properties are something we can set in the Inspector panel inside of Godot’s editor.
This is because the properties of a node are just the variables that are declared as members of the related node’s class. If we want to expose a property to the editor, we can just put @export in front of the var keyword when we’re declaring it.
What category does @export fall under?
That’s a great question… @export is an example of something kind of unique that doesn’t really fit into expression, statement, or declaration. This is a special kind of instruction called an “annotation” in GDScript. The role of an annotation to add additional information about the thing we’re about to declare.
Some languages have similar features, just with a different name and rules. For example, this same type of feature would be called a “decorator” in Python and decorators can be created by the user.
In GDScript though, annotations act more like a keyword mixed with a function. They’re part of the languages and they typically exist to do something special related to the engine. Sometimes we can pass arguments to them to change their behavior, but in the case of @export, we don’t need to.
Constants are nearly identical to variables, at least in how we interact with them. The biggest difference is that constants, unlike variables, can never change. This means we must provide an initial value when we declare them, and it will always stay the same.
This means that the “initializer” (the value we assign to the constant) is required when we first declare it. If we try to change the value of a constant later on, the computer will throw an error at us. One final gotcha is that we can’t use any expression with our constant, only literal expressions.
So why use constants?
We’ll be using variables for most of our code, but constants are useful for things that we know will never change. For example, if we have a constant value for the speed of light, we can use it in our code without worrying about it changing.
Another great use of constants is that they help us avoid “magic numbers” in our code. A magic number is a number that appears without any context or explanation. This can make it difficult to understand what the number means or why it’s there.
Here’s an example of magic numbers appearing in a spring damper equation:
var force = 120 * error + 45 * correction
What does 120 mean? What about 45? Are they even the right numbers? These numbers are just floating around in our code with no explanation of what they are or why they’re there. This makes it difficult to understand the code and can lead to bugs if we accidentally change one of these numbers.
By using constants, we can give these numbers meaningful names and add documentation (comments) to explain what they are and what they do. This makes our code more readable and maintainable.
## This is a spring constant that determines how strong the spring is.const SPRING_CONSTANT = 120## This is a damping constant that determines how strong the damper is.const DAMPING_CONSTANT = 45var force = SPRING_CONSTANT * error + DAMPING_CONSTANT * correction
This is the other most important part of programming: functions. Functions are where we put the code that actually results in something happening. They’re like little machines that take in some input, do something with it, and can then give us back some output.
Functions group together a series of statements that do something specific. We can think of them as a way to organize our code into smaller, reusable pieces. We’re going to be using functions a lot in our code, so it’s important to understand how they work.
The statements inside of a function are called the “body” of the function. In GDScript, we know what statements belong to a function by looking at the indentation of each statement. Each statement will be run in the order they’re seen unless we have a statement that alters the flow of execution.
func my_function():
	statement_1  # This will run first
	statement_2  # This will run second
	statement_3  # This will run last
Whitespace significant languages
There’s different ways of grouping lists of statements together in programming languages. Most languages31 use curly braces {} to group statements together. But not GDScript — it follows the Python approach of using indentation to group statements together.
This pattern of using whitespace to group blocks of code together is called “whitespace significance”. This is because the spaces and tabs at the beginning of each line have a direct impact on how the code is interpreted by the computer32.
You can either use tabs or spaces to indent your code, but not both in the same file. Our recommendation is to just use tabs. You can use the tab key to quickly indent blocks of code and shift+tab to un-indent them.
Most editors also allow you to “render” whitespace so you can see the differences between tabs and spaces more easily. Godot’s editor does this by default with the little icon representing a tab character.
We can write completely new functions or, in languages that support classes and inheritance, we can sometimes override certain functions from the class we’re extending from. This lets us reuse the existing functionality of the class while also adding in our own custom behavior at specific points.
Each Node class has a set of functions that are called by the engine at specific times. We can see one of these already, _physics_process. We’re going to talk about it more in a bit.
Methods
Remember how classes have members, like variables are properties when they’re declared directly as part of a class? Well the same thing goes for functions. Functions that are declared inside of a class are called methods.
The only functions we can override are the ones that are methods of the class we’re extending. In GDScript, this will be MOST functions, but there may be cases where we use functions declared elsewhere that we can’t override.
Another example is _ready, which is a great way to start experimenting with code. This function is called when the node is added to the scene tree at runtime. This means that if we add a node to the scene tree in the editor, _ready will be called when the related scene is loaded into the game while playing.
extends CharacterBody3Dfunc _ready(): pass
In the case of our game, we only have one scene that is loaded and our player.gd script is attached to the CharacterBody3D node already in this scene. So the moment we start the game, this _ready function will run.
When a function body (or any block of statements) has no statements in it, the computer is going to get mad at us and throw an error. This is because GDScript is whitespace significant and the computer doesn’t know what to do with an indented, but empty, block of code.
Thankfully we have pass — a special statement taken straight from Python to act as a placeholder. When pass is encountered, the computer will just ignore it and move on to the next statement (if there is one).
Why would this be useful?
A common practice in programming is to plan out the code by “stubbing out” functions. These are just the functions you think you may need, but with nothing in them. This is a great way to break a problem down into smaller pieces and get a better idea of all the moving parts and how they might fit together.
Up to this point, we’ve only seen functions that magically run somehow, but functions don’t actually do anything by just existing. Functions need to be “called”33 by other functions for them to run34.
Godot is calling our _ready and _physics_process functions for us, but we haven’t actually tried calling any functions ourselves yet. First let’s take a look at the syntax for calling a function before we try it out ourselves.
On the left side we have an expression that’s going to produce a “callable” value, or in other words, it’s going to give us a function that we can call. This will typically be the name of the function we want to call, but it could be a variable that holds a function reference35.
Next we have a set of parentheses () that surround the values we want to pass into the function. These are called the function’s “arguments” and it can be a list of values (expressions) separated by the commas. What values we can (and should) pass into the function depends on the function itself.
Finally, the function call itself is an expression, meaning it can produce a value. This is important to understand, because functions don’t necessarily just run instructions. They can perform calculations and then give us back the result of that calculation.
We’ve talked about variables and constants a lot but we’ve not really used them yet. So how do we actually use them?
There’s really only 2 parts of working with variables (and only one way of working with constants) and that’s getting and setting their values. We’ll get to setting values in a moment, but first let’s talk about getting values.
This is done using a lookup expression. This is the most common way we interact with variables and constants36 in our code.
We can use the name of the variable (or constant) to look up its value. This just finds the box, grabs the value that’s inside, and then passes that along as the value of the expression.
It’s important to note that we’re getting the value that the variable currently holds. If something else changes the value later on, we’d need to look it up again to see the new value.
With a theoretical understanding of calling a function, let’s try it out for ourselves using print()37. This handy little function is built into Godot and let’s us our code “talk” to us.
Anything we pass to print() in between the parentheses (the arguments) will appear in the “console”. This appears at the bottom of Godot near our debugging tools under the “Output” tab. This panel displays the values passed to print().
Here’s an example of a simple node that simply calls print() in its _ready function to write "Hello, world!" to the console.
We can use print() to do some experiments for ourselves and better understand how code works. Try passing different types of values to print() and see what happens. In the video, we passed in our speed variable to see what value it held38.
Ordered disorder
Something that can trip people up is that functions cause the computer to “jump around” our code. When we call a function, the computer stops pauses where it was and goes to the first line of the function we’re calling. Once the function is done, it comes back to where it left off and continues running the code.
Calling print()also causes the computer to jump around, but I don’t feel like stitching in the C++ internals of Godot for the sake of completing this simple explanation.
In the video, we create a new function called get_boosted_speed() to demonstrate how we can define our own functions. This function starts by taking in no arguments, but does return a value. We can tell it returns a value by the presence of the return keyword.
func get_boosted_speed():
	return speed * 2
The return keyword tells the computer that we’re done with this function and we may want to give something back to the code that called us39. This is a way of saying “hey, I did my job and here’s the result of my work”.
The moment return is encountered, the function stops running and any other code in the function after the return statement is ignored. The value we return is passed back to the code that called us, which can then use it however it wants.
Another way to think of this is that calling a function with a return value is a bit like swapping the function call with the value that was returned. This is why function calls are an expression, because they can produce a value exactly like any other expression.
Temporary box analogy
In the video, we used the analogy of a temporary box that would hold the value we returned. The function call would then swap itself out for the value in that temporary box. This isn’t too far off from how it actually works40.
At the machine code level41, the computer uses a “stack” and a series of “registers” to keep track of the values and functions that are currently running. This stack is actually where we get the term “stack trace” and “stack overflow” from. It’s a region of memory that holds the layers of function calls.
When we call a function, the computer pushes a new “layer” onto the stack that contains all the values and variables for that function. When we return from the function, the computer pops that frame off the stack and continues executing the code that called us.
We were able to call print() and pass it a value to print out. We know from our earlier explanation of function calls that the values we pass into a function in-between the parentheses are called “arguments”.
But what if we wanted to create our own functions that take in arguments? Well, we can do that too. When declaring a function, we can specify what arguments we expect to receive from the piece of code that’s calling our function.
These are called parameters and they’re really just variables without a var keyword. This is yet another case of programmers giving things different names based on the context. Each parameter has a name and can optionally specify a type.
We can also specify a default value for our parameters. This looks just like an initializer in a variable declaration, but it works a little differently. When we provide a default value for a parameter, it makes the parameter “optional”.
This means that the caller doesn’t have to provide a value for it, but they can if they want to. If they don’t provide a value, the default value will be used instead. This is a great way to make our functions more flexible and easier to use.
With all the theory we just covered, we can finally get back to uncommenting our code and rebuilding our player script. Let’s start by uncommenting the move_and_slide() function call.
If we try playing the game again, nothing will happen. This is because move_and_slide() relies on the velocity property to determine how much it should try to move our CharacterBody3D node. Since we haven’t set a value for velocity, it will just be 0 and our player won’t move.
If the player was moving and hit something, then move_and_slide() would adjust the velocity property to account for that. This is why we need to set the velocity property before calling move_and_slide().
Games aren’t a piece of software that runs once and then stops. They run continuously and are constantly updating the state of the game to give the illusion of movement and interactivity.
Somewhere inside of Godot there is some code that is running in a loop42 continuously. This loops does a lot of things, but one of the most important things it does is call the _process() and _physics_process() functions on all of the nodes in the scene tree43.
The boxes represent each frame where the computer will either do the work of the _process() function or the _physics_process() function.
The _process() function is called every frame, as fast as the computer can run it44. This is great when we’re handling things we want to update every frame, like animations or visual effects. But it can be a bit unpredictable, since the frame rate can change depending on the computer’s performance.
The _physics_process() function is called at a fixed rate (which is set to 60fps by default in the project settings). This means that it will be called at the same rate regardless of how fast _process() is able to run. This is important for things like physics, because there are some quirks to our physics calculations that can cause problems if we don’t run them at a fixed rate45.
There’s a lot of trickery that goes into supporting a feature like _physics_proces() in a game engine. A big one being sub-stepping, which is a way of breaking up the physics calculations into smaller pieces to allow work to be partially done (if we’re running too fast) or “made up” later on (if we’re running too slow).
What is this delta parameter?
The delta parameter is a special variable that is passed to both _process() and _physics_process(). It represents the amount of time (in seconds) that has passed since the last frame. This is important for things like physics calculations, because it allows us to make sure that our game runs at the same speed regardless of the frame rate.
Which frame it’s referring to depends on whether we’re in _process() or _physics_process(). In _process(), it’s the time since the last _process() frame and in _physics_process(), it’s the time since the last _physics_process() frame.
Even if we want our game to render as fast as possible, there may be times when we don’t want (or don’t need) to run our physics calculations at the same rate. This is a common practice in game engines and allows us to save on performance by not doing unnecessary work and give ourselves a larger window to do more complex calculations.
This is why we often do most of our game logic in _physics_process() and leave _process() for things that need to be updated every frame. This is even more important when we’re working with the physics system, since it runs at the fixed rate. So doing our work in _physics_process() keeps our game logic in sync with the physics system.
Our next statement is the one that’s probably most associated with programming: the if statement. This is a way to make decisions and branch off into different paths of code depending on the situation.
We categorize if statements as a type of control flow statement. This is because they change the flow of execution in our code46. This means that instead of just running the code in order, we can make decisions and run different pieces of code depending on the situation.
if not is_on_floor():
	velocity.y += get_gravity() * delta
To the right of the if keyword, we take in an expression that produces a bool value. This is called the “condition” of the if statement. If this condition is true, then the code indented under the if statement will run. If the condition is false, then the code under the if statement will be ignored, effectively causing the computer to jump down to the next unindented line of code.
The not keyword47 is a way to flip a bool value. This is called a logical not expression and is a way to check if something is nottrue or notfalse.
not true # This will produce falsenot false # This will produce true
In the video, we’re useis_on_floor() to find out if our CharacterBody3D is currently touching the ground. If it is, then is_on_floor() will return true and the not keyword will flip it to false. This causes our if statement to ignore the code inside of it.
But! If our character is not touching the ground, then is_on_floor() will return false and not will flip it to true. This means that the code inside of our if statement will run and that will apply gravity to our character.
We already know how to get the values in our variables, but what about setting them? This is where we can use an assignment statement48. This lets us replace the value of a variable — but not constants!
On the left side of the assignment, we put the name of the variable we want to change49. Then we have the = sign acting as the “assignment operator” telling us to take the value produced by the expression on the right and put it into the box (variable) on the left.
The code snippet at the top is effectively likely putting the value 42 directly in our the_answer variable. This will replace whatever value was in there before.
#Additive Assignments (and other operators)Jump to 32:41
Explaining things like the additive assignment operator is a bit tricky at this point because we don’t talk about binary expressions until later in the article50. It might be helpful to read that section first, since it will help explain this section better.
When we see a different character, like +, in front of an = sign within an assignment statement, it’s still an assignment statement. The difference is that the operator (whatever is in front of the = sign) is a way to modify the value before we assign it.
So in the case of +=, we’re saying “take the value of velocity, add 1 to it, and then put that value back into velocity”. This is a shorthand51 way of writing x = x + 1.
This isn’t limited to just addition, we can also use -= to subtract, *= to multiply, and /= to divide52 — honestly a lot of the binary expressions. This is a common pattern in programming and is used to make our code more concise.
We’re on the next if statement in our code, which is used to determine if we should make the character jump. It’s a bit more complicated than the last one, but it’s still pretty simple.
if Input.is_action_just_pressed("ui_accept") and is_on_floor():
	velocity.y = JUMP_VELOCITY
The goal here is to make the player jump when enough conditions are met. We start with getting a reference to Input system53, and then we call the is_action_just_pressed() method54 to check if the player is pressing the jump button. This method takes in a string that represents the name of the action we want to check.
The string we pass in is the name of the action (which we set up in Project Settings) and is used to check if the player pressed that action this frame55. This is a way to check if the player just pressed the button, not if they’re holding it down.
Looks like we’ve hit a new keyword, this time it’s and. This keyword is a form of binary expression, which means it’s two expressions that joined by an operator in the middle. This is a way to combine two expressions together to produce a new value.
We’ve already seen examples of this before, with the + operator. This probably won’t surprise you, but + takes two values and adds them together to produce a new value. So 5 + 5 would produce 10.
The and keyword works in a similar way, but doesn’t live in the standard arithmetic realm. Instead, it’s part of the finite math realm. This is a way to combine two bool values together to produce a new bool value. This is called a logical AND expression and is a way to check if both sides of the expression are true.
true and true # This will produce truetrue and false # This will produce falsefalse and true # This will produce falsefalse and false # This will produce false
The or keyword
The or keyword works in a similar way, but it checks if either side of the expression is true. This is called a logical OR expression and is a way to check if at least one side of the expression is true. So true or false would produce true, but false or false would produce false.
We’ve been using these all over the place whether we realize it or not, but it’s probably time we take a moment and actually talk about selector expressions. A selector expression is like a lookup expression, but it allows us to address the members of an object.
Members, like properties and methods, can also be accessed from outside of the class by other classes / scripts. This is a key difference between members (properties) and their nested counterparts (variables), as variables only exist within the scope of the function (or statement block) that they’re declared in.
When we access any member of an object, we call it a selector expression. This is done by using a . to separate the value we’re selecting it from (left) and the name of the thing we’re selecting (right).
The self keyword
Some languages, including GDScript, allow us to refer to the current object using a keyword, like self56. This is like a magic variable that always points to the object that holds the code we’re currently running.
GDScript supports this keyword, but it’s not required. So we could write self.velocity or just velocity and it would work the same way, so long as we’re inside the class that owns the velocity property.
This is useful when we want to pass a reference to the current object to another function or method. For example, if we have a method that takes an object as an argument, we can pass self to it to refer to the current object.
Up next is another variable declaration, this time we’re creating a value named input_dir (or input direction). This is going to be a Vector2 value that represents the axes of a joystick, even when we’re using a keyboard.
var input_dir := Input.get_vector("move_left", "move_right", "move_forward", "move_backward")
Wait, what is this := operator?
The := sign is still an assignment operator, but it has a special meaning in GDScript. This assignment will infer the type of the variable based on the value we assign to it. This is called type inference and we’re going to talk about the type system as a whole in a future episode.
Vectors are a critical part of game development and can be used to represent a lot of different things. The most common uses are to represent a point in 2D or 3D space, a direction, or a velocity. In this case, we’re using it to represent the direction we want to move in.
The number in the name of the vector refers to the number of dimensions it has. So Vector2 is a vector with 2 components (x and y), while Vector3 is a vector with 3 components (x, y, and z). This is a common pattern in programming and is used to make it easier to work with different types of data.
Vectors are similar to classes, but there are some differences that we’ll cover in future episodes, along with transforms. Which leads right into the next line of code.
var direction := (transform.basis * Vector3(input_dir.x, 0, input_dir.y)).normalized()
This line of code is a lot more complicated. We surprisingly haven’t talked about the order of operations for evaluating expressions and we’re purposely not talking about transforms yet57. So we’ll hold off on all the details, but he gist of it is this:
We convert our 2-dimensional input vector into a 3-dimensional (local space) vector.
We multiply that vector by the basis property of our CharacterBody3D node’s transform property. This is a way to convert the vector from world space into local space.
We then call the normalized() method on the resulting vector to make sure it’s a unit vector (length of 1). More on this in later episodes for sure.
Finally, we assign the resulting vector to our direction variable.
#Integrating player input to move the characterJump to 37:54
With our direction vector ready, we can move onto the next line — another if statement. This time we’re checking if the player has provided any movement input by using direction like a bool in our if statement.
If the player has provided any input, then we’ll use our “transformed” direction vector to set only the x and z components of our velocity vector. This is a way to move our character in the direction that the player is pressing without overriding the changes to our y component being applied by our gravity code.
Operator Overloading
The reason we can use direction like a bool is because Godot’s Vector3 type has a special feature called operator overloading. This allows us to use Vector3 in a variety of scenarios where you might normally expect a bool or float value.
When we use direction in an if statement, Godot will run a hidden function that checks if the vector is “zero” and return the true if it is, or false if it isn’t.
Some languages (like C#) allow you to define your own operator overloads, but GDScript doesn’t support this. This means we can’t create our own custom operator , but we can use the ones that Godot provides us.
As it stands right now, we only set velocity when we have directional input. If we receive no input, then velocity will be whatever value it was before since nothing is changing it. This means that our character will keep moving in the last direction they were moving in — which is not what we want58.
To do this, we’ll introduce our first else statement. This is a way to provide an alternative set of statements to run if the if condition that precedes it is false. So if our if direction: statement is false, then the code inside of our else statement will run instead.
Now that we can run some code if we’re not applying any input, we can start applying some deceleration to our character. We can do this using move_toward() to smoothly move our velocity towards 0 over time. The value we pass as the last argument of the move_toward() determines how quickly we want to move towards 0. The smaller the value, the slower we will approach 0 and the more “slippery” our character will feel.
Currently we’re using the same speed value that drives our movement speed. This means that the character will decelerate at the same rate that they accelerate, which likely feels like we’re stopping almost instantly. Try playing around with different values and see what kind of game feel you can create.
The move_toward() function is a built-in function that Godot provides in the global scope. This means that we can call it from anywhere and it’s not a method tied to any specific object59. Another example of a function in the global scope is print(), which we used earlier to print to the console.
Woof! That was a lot of information to cover in a single episode. Hopefully you were able to follow along and understand the concepts we covered. If not, don’t worry! We’ll be going over these concepts again in future episodes and we’ll be using them a lot more as we continue to build our game.
Check your work!
Want to compare your work to ours? You can find a
copy of the project on our GitHub repository. We
track each episode as its own commit, so you can see
exactly what changed between each episode.